It's a translation from Russian. Оригинальная статья здесь.
Sometimes I have to draw diagrams. What about you? I used to draw schemes in applications that I already have on my PC like Photoshop or PowerPoint. But it takes a lot of time and effort to draw a scheme in one of these! What a sad story! It's time to change something! For example, to find a more convenient application!
I decided to find an online editor in order not to download or install any programs. It would be good if a scheme will be stored on the cloud, thus it can be changed from any computer. I would also like to edit a scheme on a tablet, but looking ahead, the editors have problems with this =(.
I decided to find an online editor in order not to download or install any programs. It would be good if a scheme will be stored on the cloud, thus it can be changed from any computer. I would also like to edit a scheme on a tablet, but looking ahead, the editors have problems with this =(.
Google returns many results for «online diagram» query. I tried the first three results: free Draw.io and shareware Lucidchart and Gliffy. It's great that you don't need to register to begin drawing in these three.
I can't say which editor is better for professional use (eg, engineering, electrical diagrams, business process diagrams) because I don't draw such schemes. But for home usage I prefer Lucidchart! Its free version allows you to store up to 5 diagrams - that enough for me. In Draw.io developers have paid attention to functionality, but haven't paid attention to convenience of the user interface.
Below I will tell you more about each of these three editors.
Quick links:
As a test, I've drawn a simple diagram consisting of rectangles in all three editors.
Lucidchart
Lucidchart looks like:

URL of the editor: https://www.lucidchart.com
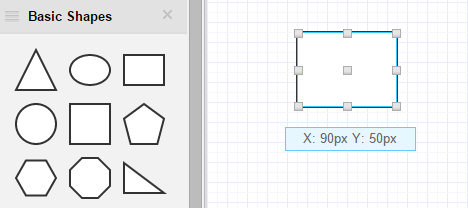
To draw a simple scheme in Lucidchart, you should drag and drop figures from the panel to the sheet. Done!

To add a connection you should place the cursor over a contour of a figure, then click on the contour and start "dragging" it. A connection line will stretch from the contour. I was surprised when I created a connection this way for the first time. It's so suitable and is even too easy! The editor will suggest choosing a final figure after creation of a link. Thus it's not necessary to move to the left panel to add a final rectangle to the diagram.

Adding a connection in Lucidchart
You can drag connection lines from round points  located on a contour. So connection will start exactly in the middle of a side. It's neatly! But in general, connection can be drawn from any point of the contour.
located on a contour. So connection will start exactly in the middle of a side. It's neatly! But in general, connection can be drawn from any point of the contour.
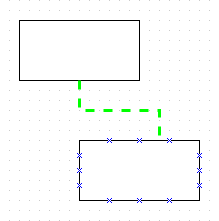
То change a connection you need to place the cursor over the end of the connection and move the connection line to a new point of the scheme. But here you can experience some disappointment from the program for the first time... Be brave! The cursor can move a figure or an existing connection or even draw a new connection. Switching between these three actions occurs unpredictably.
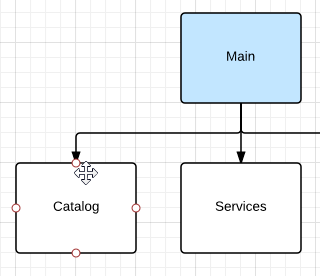 On the first picture the cursor moves the rectangle "Catalog".
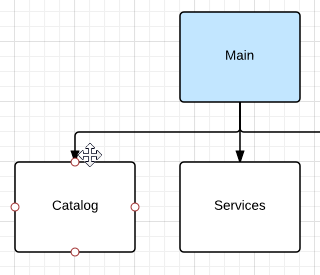 On the second picture the cursor moves the connection (the cursor is close to connection and outside of the figure).
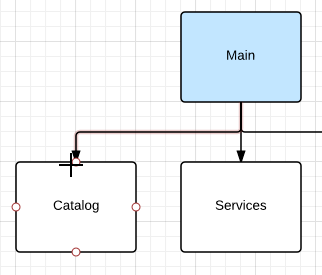 On the third picture the cursor creates a new connection line (the cursor becomes a "Plus").
 After several attempts these operations will become more apparent, or may be it will be the critical point after which you refuse the editor.
All figures in the editor grouped in categories. When I wanted to pick a "rectangle" I found that there are rectangles at least in three categories: "STANDART", "FLOWCHART" and "CONTAINERS". If you need to draw diagrams with connections, like I've done above, choose rectangle from category "FLOWCHART", because it has connection points in the middle of a side. The rectangle from category "CONTAINERS" has no text, because it is conceived as a container for other figures.

Rectangles from different categories. I use rectangle from "FLOWCHART" category
The editor has a subtle but powerful search box above the left panel. You can insert a picture or an icon from Lucidchart Library or Iconfinder (a great icon resource) or beloved Google Images! To add a required picture, you don't even have to switch to another tab!
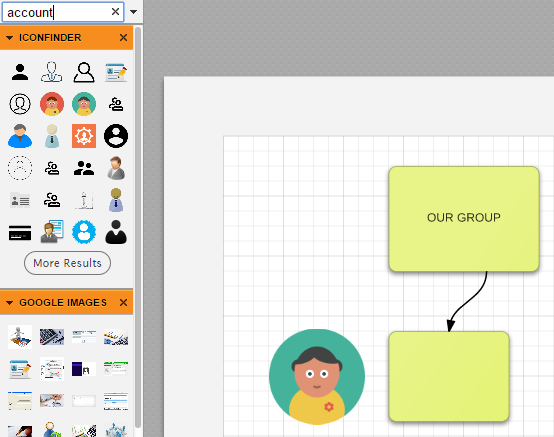
Adding pictures and quick search of figures
In order to make schemes neat and aligned the editor shows correct margins, snaps to a grid and draws guidelines. So even in case of the absence of the sense of beauty - the scheme will be beautiful enough! Also, all three editors have menu commands: "Distribute objects ..." and "Align objects ...", which are placed objects at an equal distance from each other and align them with each other.
Margins, guidlines, snap to grid
Basic styles are on the top panel. On the right panel there are buttons for advanced settings (gradient, corner radius) and for additional actions (flip, angle, object position).
Filling is convenient. If you are pointing to a specific color, this color is immediately appling to the figure. You can select different colors and understand what fits best. By the way, the other two editors don't let to change filling so easily.

Filling is convenient
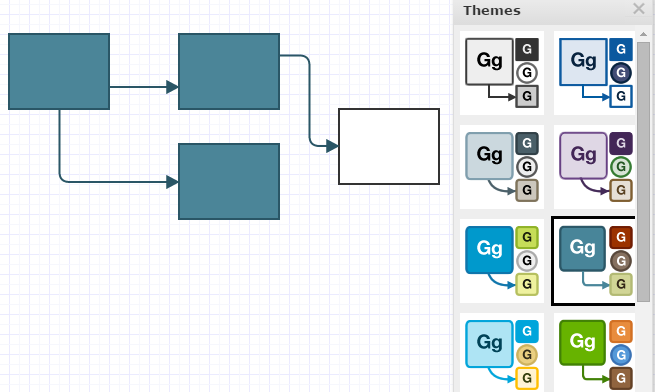
Lucidchart has Themes, which can completely change the look of a scheme. Themes button is unattractive, so it's easy to miss.
Themes button is the first on the top panel
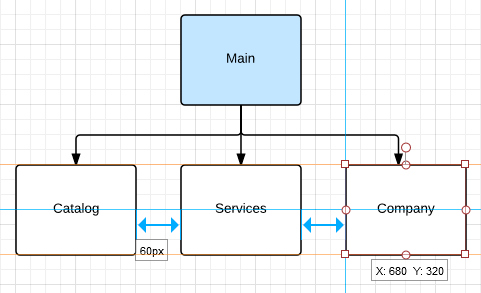
If user has changed filling of some figures, applying theme will not change the selected design. This allows you to save selected objects after applying the theme (as the blue object "Main" on my picture).

Applying themes
I like selection by frame in the editor. To select an object not necessarily that it is entirely inside of the frame. It's enough to stretch frame on at least part of the object. For example, on my picture three rectangles are selected. I'm used to this method of selection, so it's important for me.
Selection by frame
The editor has Templates. In addition to standard templates, there are Community templates. You can choose template when you create a new diagram. The largest number of templates are stored in a category "Education" (for pupils, students and teachers). Among them, for example, there are "Visualization of a dictionary" or "Plan of writing an essay." It seems to me that editor fits most for these educational diagrams!

Templates in Lucidchart
The editor works in desktop browsers only. In tablet browser you can only view schemes but you can't edit them :(!
The free version can store on the cloud to 5 diagrams (each up to 60 elements). The paid version is available for $ 5 per month.
Quick links:
Gliffy
My next editor is Gliffy. It looks like:

URL of the editor: https://www.gliffy.com
Objects as in Lucidchart are created by drag from the left panel.
Adding objects
After "dragging" a rectangle on the sheet I'm going to draw a connection. Gliffy has the special "Connector" Tool for this. You need to click on "Connector" button on the top panel. The interface contains not a lot of buttons, so it's not difficult to find the "Connector" button.

Connector Tool Button
After pressing the button all points to which you can attach the line will be highlighted. This is suitable, you can easy draw connections between figures.

Drawing connections in Gliffy
After finishing draw connections you need to return to the default cursor, so you should to select tool "Pointer".
I think it's not very suitable and obvious for me. I have to constantly switch between tools ("Connector" and "Pointer") and have to observe what tool is selected.
I used to think that is the only way to make connections. But it turns out I can draw connections without switching tools (in Lucidchart, for example). That is faster and easier for me!
Maybe for some people this approach is more comfortable. As they say, every man to his own taste... To quickly switch between tools use hotkeys.
Another stumbling block for me was changing a filling and line style. In the editor, these settings are hidden. You have to select an object (or connection), have to find the button near the object, have to understand that the panel of options will be shown by clicking on that button. For the first time I decided that the application has not ability to change the filling. But then I accidentally saw tips before loading: "Click on this button ...". Icon of this button is not like the "Fill" icon, the button is not always visible. Therefore if you too didn't realize how to change style of objects then I'm not alone.
In general changing parameters near an object is a good solution because you don't need to move to the top panel and look for a button there.

Hidden button, hidden settings in Gliffy
Gradient and shadows are enable but they are poorly configured. The gradient is always from white to the selected color. The shadow is always the same. On the one hand well I don't think about it, on the other hand if I will want something special...
Gliffy allows you to draw neat diagrams because it shows guidelines and snaps to a grid. The editor even has a handy feature inserting figures at an equal distance (Ctrl + C and Ctrl + V). That is after the first insert is necessary to align a new figure relative to the original and all of the following figures would be insert with the same margin.

Inserting figures at an equal distance in Gliffy
But for some reason the size of rectangles doesn't correspond with a grid. Perfectionists have to themselves resize figures to align them to grid.
The size of a rectangle doesn't correspond with a grid in Gliffy
Editor has Themes. But themes have disadvantages. Firstly new figures added after applying a theme still were white instead of theme colors. Though new connection had theme color.
Theme doesn't apply to new figures
Secondly in the list of themes there is no the default initial theme. Therefore after selecting the theme, it is impossible to return to the scheme with white rectangles. If you have filled some key figures, your colors will be replaced with theme colors. In my case, the top and original blue rectangle "Main" became the same color as the rest of figures. In general, using themes in Gliffy may bring both good and bad impression.

Applying themes in Gliffy
In contrast with themes Templates in Gliffy are good. There are many templates, and most of them are for professional use. Most templates are in categories: "Software Design and UML", "Network Diagrams", "Flowchart".
You can create a new diagram from a template.

Templates in Gliffy
The editor works only in the desktop browser. On the tablet I could not open or edit schemes. All schemes are stored on the cloud, on the Gliffy servers. Therefore diagrams accessible from any computer.
Exactly for home personal usage I don't really like this editor. I advise you to look at a few tips when you start thus you see all possibilities, because some of them are not obvious. The free version allows you to store 5 diagrams with public access and limited library shapes. The paid version is available from $ 4 per month.
Quick links:
Draw.io
The last editor is Draw.io. It looks like:

URL of the editor: https://www.draw.io/
In contrast to the two previous editors this editor is completely free. And he's the only one of all three editors which allows editing scheme on the tablet! It is functional but its interface is not always intuitive. You can do everything you need using the editor, but it's hard.
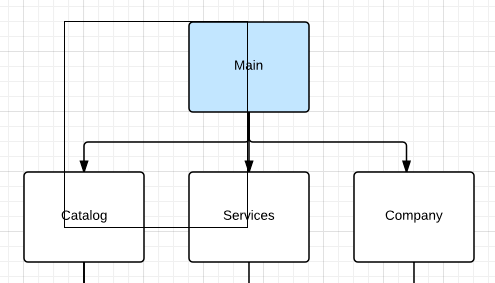
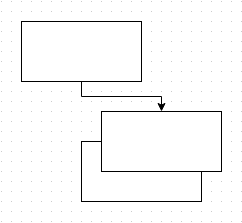
Connections are created by stretching from a point on a contour as in the two other editors. When a connection line is drawn the editor automatically will add the final figure. That will be a complete copy of the initial figure (on the picture you can see a new "Main" figure).

Adding connections and adding a final figure in Draw.io
There is a minor disadvantage during this process. If the gap between connection line and the figure accidentally will be occurred, the editor will create the unwanted final figure instead of attaching the connection line to the point.
A connection line can be attached only to special marked points on the contour in contrast to the other two editors where a connection line can be attached to any point on the contour.
On the tablet you can create a connection the only way, moving connection icon from the left panel. But here there is a disadvantage too. On the panel there are at least five kinds of connection icons. You have to think what kind of icon to take and how they differ.
Filling is not very suitable, because there is no recently used colors and you need to press the "Apply" button after selecting a color.

Filling in Draw.io
The editor has the right panel, where you can change style settings. On the panel there are styles of something that is selected now. For standard usage amount of settings seems too big! There are specific settings such as "Size of a connection end" or "Hide connection line" (a dangerous setting for beginners).
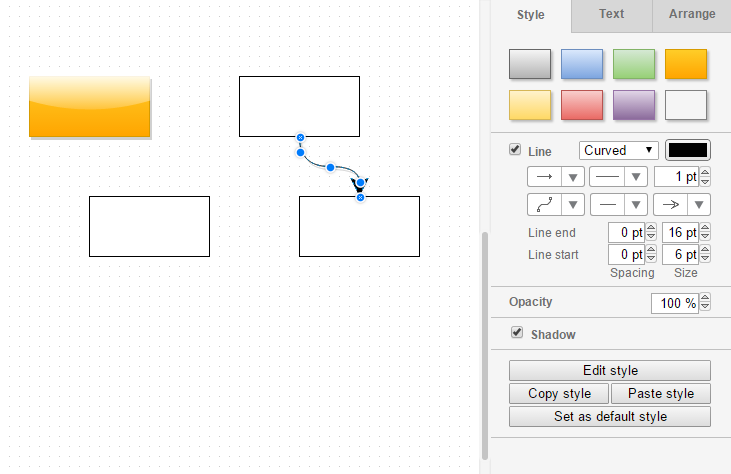
14 style options for connection line in Draw.io
The editor has search box for adding icons (probably from Iconfinder) and for quick search of figures in Library Draw.io. It's suitable!

Adding icons and quick search in Draw.io
The editor has not Themes in contrast to the two previous editors. But there is a solution to "imitate" Themes - it's to set a default style for figures and connections. I can draw the first shape and the first connection, then I should change their styles and click on "Set as default style" button. After that all new figures and connections that I created got my default style. But of course this is longer than just to choose a Theme.
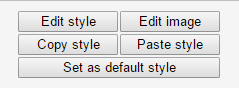
Setting a default style in Draw.io
Draw.io has Templates. In general templates intended for professional use. Most templates are in categories: "Software Development", "Scheme network environment", "Engineering schemes."

The editor has the ability to quickly insert a horizontal or vertical part of a scheme. This ability is in the "Insert" menu.
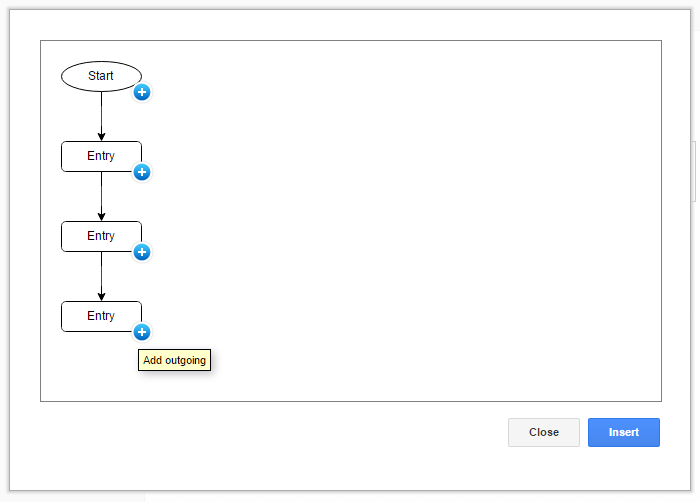
Quick inserting part of a scheme in Draw.io
Draw.io doesn't store diagrams on its servers but it allows you to store them in Google Drive or Dropbox.
I would not have chosen this editor for home usage. I think this is the complex editor with the complex interface for creating professional diagrams. He has no margins tips; customizing style of objects is difficult; making connections requires skill. Its interface is less attractive and kindly than interfaces of previous editors.
Quick links:
Comparison table
| Options | Lucidchart | Gliffy | Draw.io |
|---|---|---|---|
| Ease of learning | 3 | 1 | 1 |
| Ease of design style settings | 3 | 2 | 1 |
| Themes | 3 | 2 | 0 |
| Professional templates | 1 | 3 | 2 |
| Main Category of the templates | Education, UML | Software Design, UML, Network Diagrams | Software Design, Engineering, Network Diagrams |
| Default style | Modern, informal | Modern, formal | Rigorous, formal |
| Search and adding icons | Own library, Iconfinder, Google Images | Bing Images | Own library, Iconfinder |
| The main inconvenience for me |
Non-obviousness when moving connections | Non-obviousness to open design settings, the need to switch between tools | Challenges for change design settings |
| Storage on the cloud | The server application | The server application | Google Drive, Dropbox |
| Tablet support | Only view diagrams | No support | Full support |
| Price | Free limited account; paid account from $ 5 / month | Free limited account; paid account from $ 4 / month | Free |
No comments:
Post a Comment